Vortex Trap
All
magnetic traps rely somewhat on vortex effects but this particular trap
uses a vortex a bit more actively. The vortex trap uses something called
the "vortex tube phenomenon".
Following is a description of the vortex tube phenomenon
from the Vortec web site at:
http://www.iscsales.com/vortec/spotcooling.html#vortex
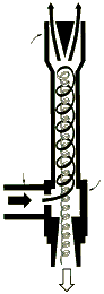 "Vortex
Tube Phenomenon
The vortex tube was discovered in 1930 by French physicist
Georges Ranque. Vortec was the first company to develop this phenomenon
into practical, effective cooling solutions for industrial appliacations.
Here's how it works.
Fluid that rotates about an axis -- like a tornado --
is called a vortex. A vortex tube creates a vortex from compressed air
and separates it into two air streams -- one hot and one cold. Compressed
air enters a cylindrical generator which is proportionately larger than
the hot (long) tube where it causes the air to rotate. Then, the rotating
air is forced down the inner walls of the hot tube at speeds reaching 1,000,000
rpm. At the end of the hot tube, a small portion of this air exits through
a needle valve as hot air exhaust. The remaining air is forced back through
the center of the incoming air stream at a slower speed. The heat in the
slower moving air is transferred to the faster moving incoming air. This
super-cooled air flows through the center of the generator and exits through
the cold air exhaust port."
Vortex tubes can also be used to separate oil from water.
When oil and water are spun together in a vortex tube the water, being
heavier tends to follow the path of the hot air in the example cited above
and the oil being lighter follows the cold air path and exits through the
cold air exhaust port.
A magnetic ORMUS trap separates the portion of water which
is superconducting ORMUS material from that portion which is just plain
water. In the example above, the water would follow the hot air path and
the ORMUS water would follow the cold air path. This effect is induced
by spinning the water in a tube which has magnetic tape or other magnetic
structures attached to it. Here is a vortex trap made of transparent acrylic
with the inner vortex clearly visible:
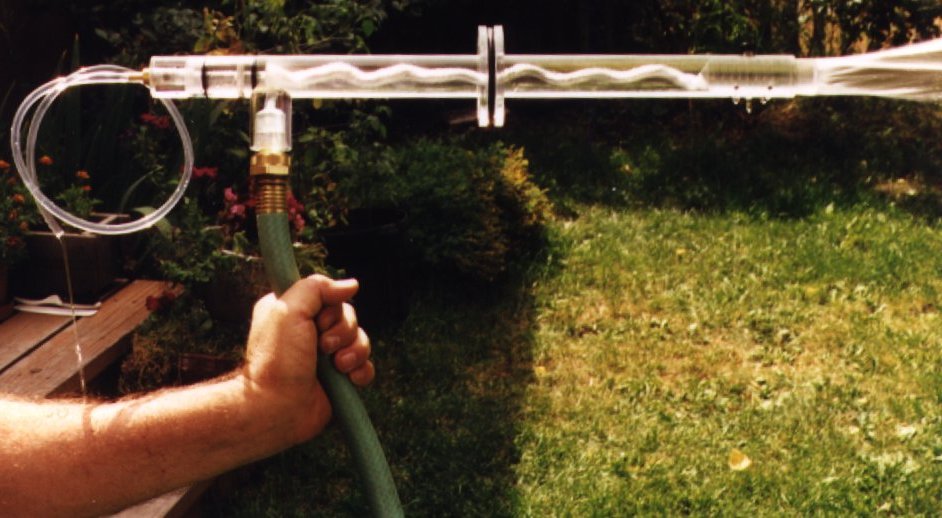
The materials used to make a non-transparent PVC version
of this trap cost less than $20. They are as follows:

Main Vortrap parts
-
18 inches of 1" PVC pipe (sched. 40)
-
1 - 1" Tee with the 1" PVC fittings in line and a half inch
female pipe thread at right angle.
-
1 - close PVC 1/2" pipe nipple
-
1 - 1" PVC to 1/2" pipe reducer
-
1 - 1" PVC pipe coupler
-
2 - nylon reducers which go from 1/2" male pipe thread to
1/4" female pipe thread
-
1 - brass adaptor which goes from 1/4" male pipe thread to
1/8" compression fitting
-
2" of 1" od. Plastic rod
-
3 long stainless steel set screws.
-
2 feet of 1/8" polyethylene tubing with brass insert for
compression fitting
-
2 feet of self adhesive magnetic tape
-
6 - 3/4" discs of polypropylene oil spill absorbing fabric
-
Teflon pipe tape
-
PVC cement
-
1 - 1/2" female pipe to female hose connector
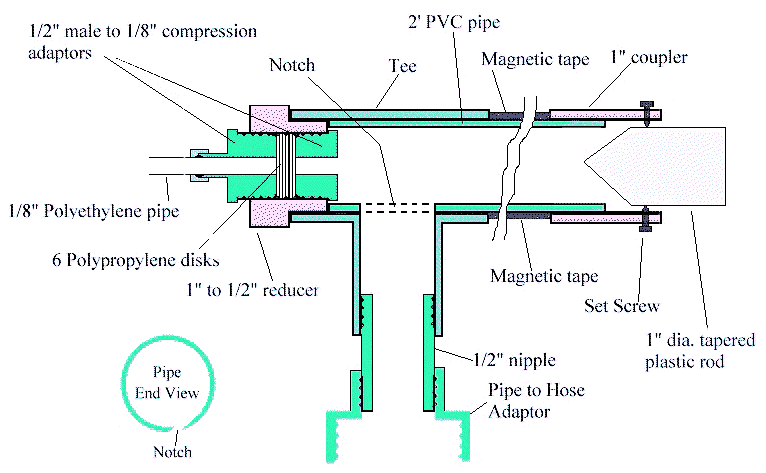
Cross Section View of Vortex Trap (Not Drawn to Scale)

Main Vortrap parts in an exploded view
Tools required:
-
Hack saw
-
1 5/16" reamer, drill bit or hole saw
-
Flat file
-
1/2" pipe tap
-
Pipe deburring tool
-
Drill and tap for set screws
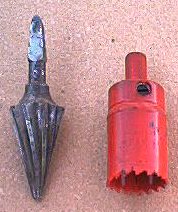
Pipe deburring tool
and 1 5/16" hole saw
Procedure:
-
Ream or drill out the 1" tee so that the shoulder which is
supposed to stop the 1" PVC pipe from going to far into the tee is removed
(the 1 5/16" hole saw is ideal for this task).
-
Using a hack saw blade, saw a 1" deep notch or slot down
into the end of the PVC pipe so that the notch or slot enters the wall
of the pipe at a tangent to the inside wall of the pipe. This notch is
where the water will enter the pipe and it is important that it directs
the water into the pipe obliquely (see pipe end view in cross-section picture
above for detail).

Notch/Slot Detail
-
Smooth and trim this notch/slot.
-
Taper the inside of the other end of the 1" PVC pipe using
a pipe deburring tool similar to the one illustrated above.
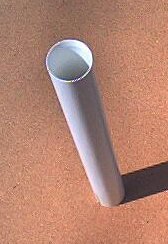
View of pipe end showing
the taper on the inside
-
Insert the notched end of the 1" pipe into the tee far enough
that the notch goes completely past the 1/2" threaded hole in the side
of the tee.
-
Make sure that everything fits and then solvent weld the
pipe into the tee so that the notch is centered in the 1/2" pipe threaded
opening.
-
Run the pipe tap into the PVC reducer from each end.
-
Thread one of the nylon reducers into the PVC reducer from
the inside using some Teflon tape to insure a good seal.

Names of parts
-
Place the polypropylene fabric disks into the outside threaded
portion of the PVC reducer and thread the other nylon reducer in till it
compresses the fabric against the inner nylon reducer. Be sure to use Teflon
tape on the threads.
The polypropylene fabric is not essential, it just improves
yield a bit. In the vortrap (which is the only trap to use the fabric)
the fabric serves two functions. It slows down the exit of the "good" water
and it shows a preference for the oilier m-state water over ordinary water.
The ORMUS elements, when they are in solution in water,
are in an oil form. This oil form appears to be soluble in water till it
reaches a certain concentration where it will separate from the water on
its own. Since the fabric has a preference to absorb oil this allows it
to pass oily m-state water through more readily than the less oily waste
water.
The filter also slows the exit flow down. This helps to
prevent mixing of the m-state water with the fresh water coming in from
the hose. It also helps to keep the output from the "good" end to a rapid
drip. Intuitive testing indicates that a rapid drip is approximately the
output speed that results in the highest concentration of ORMUS in the
output flow.
Careful design, using sophisticated fluid dynamics modelling
algorithms, might be able to eliminate the need for the filter but these
sorts of design tools are beyond my abilities and would result in a design
which is beyond the capabilities of the home experimenter.
-
Using teflon tape on the threads, thread the brass compression
fitting adaptor into the outside nylon reducer.
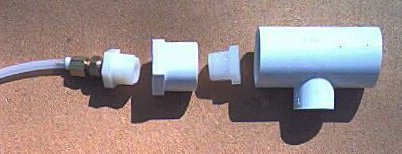
Inlet end parts ready for assembly
-
Solvent weld the completed PVC reducer assembly into the
other end of the 1" tee.
-
Thread the close pipe nipple into the tee using Teflon tape.
-
Drill and tap three equally space holes around the circumference
of the 1" coupler about 1/4" in from one end.
-
Solvent weld the other end of the 1" coupler onto the free
end of the PVC pipe.
-
Get one end of the 2" long plastic rod turned down to a cone
shape.
-
Insert the tapered end of the rod into the open end of the
1" coupler and fix it in place by tightening the set screws through the
coupler.
-
Cut two pieces of the magnetic tape so that they fit along
the exposed length of the PVC pipe. Attach them on opposite sides of the
pipe.
-
Thread the pipe to hose adapter onto the pipe nipple in the
tee using Teflon tape to seal the threads.

Your finished vortex trap should look something like
this.
You use this trap by hooking the hose adapter to a hose
and adjusting the pressure going in so that you get a good vortex of water
coming out of the coupler end of the trap and a slow drip of "water" out
the end of the polyethylene tube. You can also adjust the tapered rod in
and out of the coupler in order to get things just right.
Experiments
-
Try different directions of vortex by changing the slot design.
-
Try a series of small holes instead of a slot.
-
Adjust the tapered rod (nose piece) in and out to change
the amount of drip from the polyethylene tubing.
-
Try different types and configurations of magnets.
Some experimenters have noticed that stronger additional
magnets improve the apparent quality of the "good" output water. One experimenter
has placed 56 - 3800 gauss magnets around the long pipe on his trap! He
was unable to find fabric so he modified his trap to have a lower back
pressure so that the "good" output flow would still be a drip. Here are
some of his comments on his design:
I set the device to produce a steady drip on the outlet
with an occasional air bubble. The presence of the bubbles indicates cavitation
and ariation of the water entering the tube and subsequently a vortex.
I did not make a clear tube type. At this slow outlet rate it took over
two hours to fill a one-gallon jar. I calculated flow rate on the
hose to be very close to 200 gallons per hour. This makes the potential
concentrate in the jar roughly 400/1. This would make one glass of the
water equivalent to about 400 non-concentrated glasses.
Here is a picture of this gentleman's first eight-magnet
configuration:
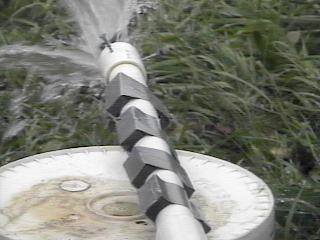
And here is a picture of his 56 magnet configuration:
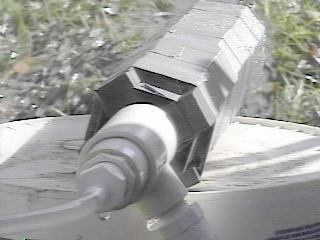
The magnets are Radio
Shack "High Energy" magnets as advertised in their catalogue
(pn: RS 640-1877). They measue 3/8 inch deep, 7/8 inch wide,
and 1 7/8 inches long and are made of strontium ferrite. The data
sheet specifies they are 3800 gauss per sqare inch with an attraction force
of about 8 pounds. This makes it necessary to tape them very securely.
If allowed to snap together they will break. He purchased a quantity (50)
from Radio Shack ONLINE for a 10% discount. Locally they will usually have
up to 10 on hand. They cost $.99 each but they seem to be out of
stock.
When this gentleman added the additional magnets he and
his wife noticed that the m-state water had become "milky". They sent this
picture:
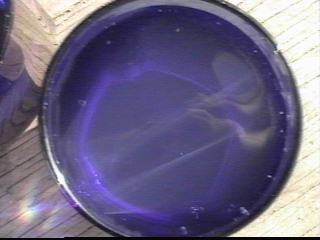
Here are their comments on this. First the comments from
the lady who is writing the Trap
Water Diary:
The picture attached is our m-state water from the vortex
trap that now has 56 magnets on it, will have more pics later on tonight
to send ya too. The sight of the sun shinning thorugh the m-state
water is totally awesome and it really is milky looking.
And here are his comments:
My wife sent you a picture earlier of the colloidal M-State
we have recovered from our well water. I was very surprised to see the
particles suspended in the water under strong light. We produced this effect
when making colloidal silver a couple of years ago. We noticed this when
pouring some in the kitchen and the sun happened to be shining in.
Other unusual properties were also observed with the water
from the 56 magnet trap. These properties are described at:
http://www.subtleenergies.com/ormus/tw/m-seeps.htm
The original inventor of the magnetic trap concept says that
he has also gotten a similar cloudy water by running the trap water from
the first trap through a second trap stage. While this results in a significant
reduction of the overall volume of product, the output of the second stage
is much more potent than the output of the first stage. It would seem that
the key to this sort of concentration in a single stage is the addition
of lots of strong magnets.
 "Vortex
Tube Phenomenon


